
Setting the temperature
2-zone automatic climate control
Different temperatures can be set for the driver's and front-passenger sides.
► Turn the SmartKey to position 2 in the
ignition lock.
► To increase/reduce: turn controls 1 and 7
clockwise or counter-clockwise.
Only change the temperature setting in small increments. Start at 72 °F (22 °C).
3-zone automatic climate control
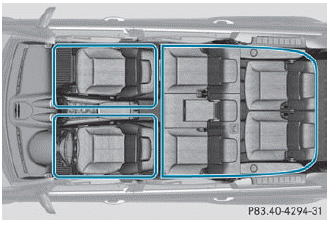
Automatic climate control climate zones
You can select different temperature settings for the driver's and front-passenger sides as well as for the rear compartment.
► To increase/reduce the frontcompartment
temperature using the
front control unit: turn the SmartKey in
the ignition lock to position 2.
► Turn controls 1 and 7/9 clockwise
or counter-clockwise.
Only change the temperature setting in small increments. Start at 72 °F (22 °C).
USA only:
► To increase/reduce the rearcompartment
temperature using the
front control unit: turn the SmartKey in
the ignition lock to position 2.
► Press the
 button.
► Turn control 7 clockwise or
counterclockwise.
Only change the temperature setting in small increments. Start at 72 °F (22 °C).
Canada only:
► To increase/reduce the rearcompartment temperature using the front control unit: turn the SmartKey in the ignition lock to position 2.
► Press the
 button.
The display changes to rear-compartment climate control.
► Turn control 9 clockwise or counterclockwise.
Only change the temperature setting in small increments. Start at 72 °F (22 °C).
 To return to the standard display, press
the button.
To return to the standard display, press
the button.
The rear display changes to the standard
display automatically after three seconds.
► To increase/reduce the temperature in the rear compartment using the rear control panel: turn the SmartKey in the ignition lock to position 2.
► Turn control 18/22 clockwise or counter-clockwise.
Only change the temperature setting in small increments. Start at 72 °F (22 °C).
See also:
Ashtray in the front-compartment
center console
The holder under the ashtray is not heat
resistant. Before placing lit cigarettes in the
ashtray, make sure that the ashtray is
properly engaged. Otherwise, the holder
could be damaged.
...
Digital speedometer
Press the or
button on the
steering wheel to select the Trip menu.
Press or
to select the digital
speedometer.
1 Digital speedometer ...
Setting a speed
WARNING
Keep in mind that it may take a brief moment
until the vehicle has made the necessary
adjustments.
Increase or decrease the set vehicle speed to
a value that the prevailing road cond ...