
Tire pressure specifications
WARNING
Follow recommended tire inflation pressures.
Do not underinflate tires. Underinflated tires
wear excessively and/or unevenly, adversely
affect handling and fuel economy, and are
more likely to fail from being overheated.
Do not overinflate tires. Overinflated tires can
adversely affect handling and ride comfort,
wear unevenly, increase stopping distance,
and result in sudden deflation (blowout)
because they are more likely to become
punctured or damaged by road debris,
potholes etc.
Do not overload the tires by exceeding the
specified load limit as indicated on the Tire
and Loading Information placard on the
driver's door B-pillar. Overloading the tires
can overheat them, possibly causing a
blowout. Overloading the tires can also result
in handling or steering problems, or brake
failure.
The recommended tire pressures for the tires mounted at the factory can be found on the labels described here.
Option 1) Tire and Loading Information placard on the B-pillar on the driver's side of the vehicle.
The Tire and Loading Information placard contains the recommended tire pressures for cold tires on a fully loaded vehicle and for the maximum permissible vehicle speed.
 The specifications given on the following
Tire and Loading Information placard are
examples. Tire pressure specifications are
vehicle-specific and may deviate from the
data shown here. The tire pressures
applicable to your vehicle can be found on
the Tire and Loading Information placard on
your vehicle.
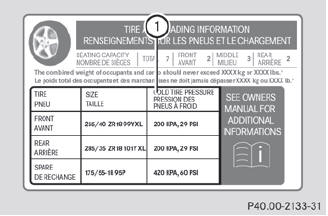
1 Recommended tire pressures
Option 2) Tire pressure table on the inside of the fuel filler flap.
The tire pressure table contains the recommended pressures for cold tires for various operating conditions, i.e. differing load and speed conditions.
Specifications shown in the examples of
tire pressure tables are for illustration
purposes only. Tire pressure specifications
are vehicle-specific and may deviate from
the data shown here. Tire pressure
specifications applicable to your vehicle
are located in your vehicle's tire pressure
table.
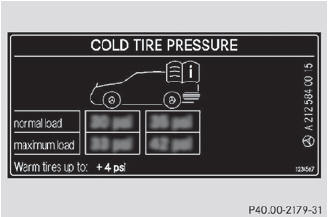
Example: tire pressure table for all tires approved ex-works for this vehicle
If a tire size precedes a tire pressure, the tire pressure information following is only valid for that tire size. The load conditions "partially laden" and "fully laden" are defined in the table for different numbers of passengers and amounts of luggage. The actual number of seats may differ.
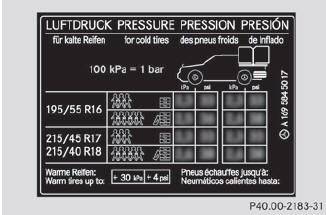
Example: tire pressure table with tire dimensions
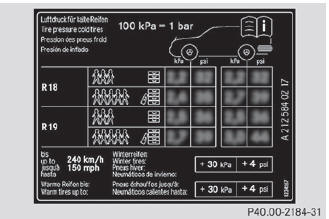
Some tire pressure tables show only the rim diameters instead of the full tire size, e.g. R18. The rim diameter is part of the tire size and can be found on the tire sidewall.
If the tire pressures have been set to the
lower values for lighter loads and/or lower
road speeds, the pressures should be reset
to the higher values:
• if you want to drive with an increased load
and/or
• if you want to drive at higher road speeds.
The tire pressures for increased loads
and/or higher road speeds, shown in the
tire pressure table, may have a negative
effect on driving comfort.
emergency/collapsible spare wheel
(depending on vehicle equipment) can be
found:
• printed in yellow on the rim of the
emergency/collapsible spare wheel
• in the "Wheel and tire combinations"
section in this manual
• on the Tire and Loading Information placard
on the B-pillar on the driver's side.
If the tire pressure is not set correctly, this can lead to an excessive build up of heat and a sudden loss of pressure.
For further information, consult a qualified specialist workshop, e.g. an authorized Mercedes-Benz Center.
See also:
Premium-grade unleaded gasoline
To ensure the longevity and full
performance of the engine, only premiumgrade
unleaded gasoline may be used.
If there is no premium-grade unleaded
gasoline available and regular-grade
unleade ...
Cleaning the exhaust tail pipes
Impurities combined with the effects of road
grit and corrosive environmental factors may
cause flash rust to form on the surface. You
can restore the original shine of the exhaust
tail pipe by cl ...
Detaching and storing the cargo net
Detach guide rod 2 from bracket 1 ().
Press the red button on the upper and lower guide rods.
Fold the cargo net and roll it up.
Close the two Velcro fasteners on the cargo net holder.
...